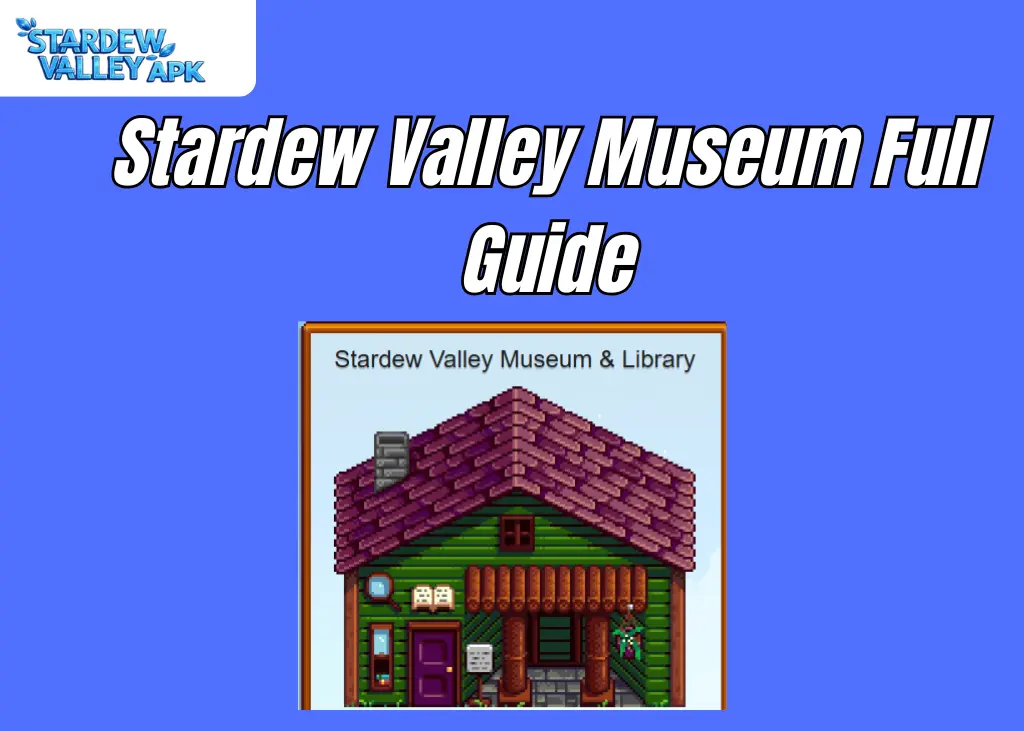
Stardew Valley Museum Guide: Complete Collection, Rewards & Tips (2026)
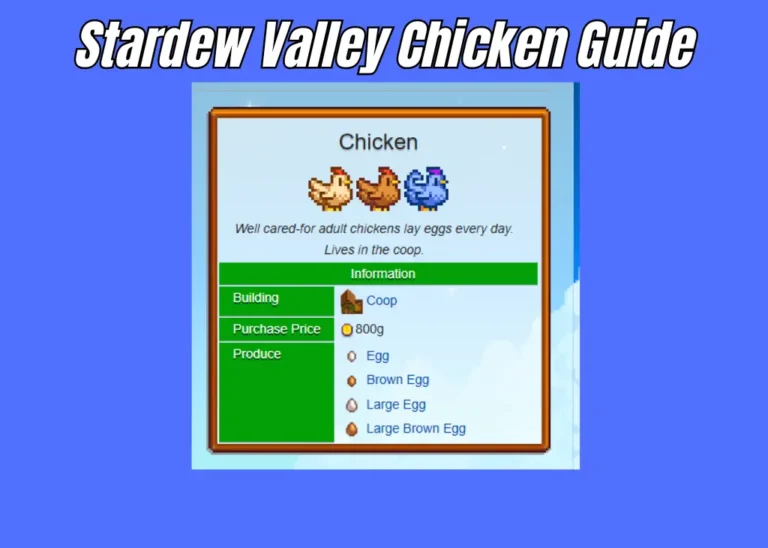
The Stardew Valley Museum is located in southeastern Pelican Town and run by Gunther. You donate 42 artifacts and 53 minerals, 95 unique items total, to fill the collection. Gunther rewards you at every milestone, with the most important rewards being:
- 60 donations Rusty Key (unlocks the Sewers)
- 80 donations Skull Key (unlocks Skull Cavern)
- 95 donations Stardrop (permanent energy increase)
Start donating from Day 1. Missing the early milestones is one of the most common progression mistakes in the game.
If You Want to play Stardew Valley, then you need to download and install the latest Stardew Valley APK on your Android phone.
What Is the Stardew Valley Museum?
The Museum sits in the southeastern corner of Pelican Town. When you first arrive, it is completely empty. Gunther, the curator, asks you to help restore the collection by donating artifacts and minerals you find while farming, mining, fishing, and exploring.
It is far more than a cosmetic side activity. The Museum is a structured progression system. Every donation milestone unlocks something useful, and two of those unlock the Rusty Key and the Skull Key, which open hidden areas that are critical for mid and late-game advancement. Completing the full collection also counts toward the game’s Perfection tracker.
Museum basics at a glance:
| Detail | Info |
| Location | Southeastern Pelican Town |
| Curator | Gunther |
| Total donatable items | 95 (42 artifacts + 53 minerals) |
| Display spaces | 102 total (7 extra for decoration) |
| Completion reward | Stardrop + A Complete Collection achievement |
| Perfection requirement | Yes |
How to Donate Items to Gunther
Donating is simple, but a few rules catch players off guard.
Step-by-step donation process:
- Walk to the Museum in southeastern Pelican Town
- Approach Gunther at the counter and interact with him
- Select the Donate option from the dialogue menu
- Your inventory opens. Select the item you want to donate
- Confirm the donation and collect your reward if a milestone is reached
Important donation rules:
- Only unique items count toward your total; duplicates earn nothing
- Rewards trigger based on your cumulative unique donation count
- A few specific artifacts trigger their own special rewards regardless of your total count
- You can check your progress anytime through the Collections tab in your menu
- The ledger on Gunther’s desk lets you rearrange your display layout at any time
Pro Tip: Six center display spaces cannot be examined once items are placed on them. Leave those six spots empty or use them for less important items so every piece in your collection remains readable.
Complete Museum Rewards List (All Milestones)
Donation Count Rewards
This is the most searched section in every Museum guide. Here is the complete milestone reward table:
| Donations | Reward |
| 1 | Parsnip Seeds x5 |
| 5 | Cauliflower Seeds x9 |
| 10 | Gold Ore x30 |
| 15 | Melon Seeds x9 |
| 20 | Geode Crusher Recipe |
| 25 | Starfruit Seeds x9 |
| 30 | Pyrite |
| 35 | Aquamarine x2 |
| 40 | Rarecrow #8 + Treasure Trove Achievement |
| 50 | Bear Statue |
| 60 | Rusty Key |
| 70 | Geode Crusher (second recipe) |
| 80 | Skull Key |
| 90 | Pumpkin Seeds x9 |
| 95 | Stardrop + A Complete Collection Achievement |
Rewards come every 5 donations until you hit 40, then shift to every 10. Each one builds on the last, giving you practical farming tools early and major progression unlocks in the mid and late game.
Special Artifact Donation Rewards
Beyond milestone rewards, donating specific artifacts triggers unique bonuses regardless of your total donation count:
- Ancient Seed Unlocks the Ancient Seed crafting recipe and gives you one free plantable Ancient Seeds pack
- All four Dwarf Scrolls (I, II, III, IV) unlock the Dwarvish Translation Guide, letting you communicate with the Dwarf merchant in the Mines
- Ancient Drum + 2 other artifacts Rewards a Drum Block furniture item
- Bone Flute + 2 other artifacts: Rewards a Flute Block furniture item
- Chicken Statue + 4 other artifacts: Rewards a Chicken Statue decoration
- Complete prehistoric bone set. Rewards the Sloth Skeleton display piece
- Rare Disc + Dwarf Gadget (after 10+ prior artifact donations) — Rewards the Burnt Offering
Most Important Museum Rewards Explained
Not every reward carries equal weight. These three milestones change how you play the game.
Rusty Key 60 Donations
The Rusty Key is delivered to your mailbox the morning after you donate your 60th unique item. It unlocks the Sewers beneath Pelican Town, where Krobus lives and operates a permanent shop.
What Krobus sells:
- Void Egg
- Void Mayonnaise
- Monster Musk Recipe
- Stardrop (one-time purchase — permanent energy boost)
- Iridium Band (rare rotation item)
- Seasonal items at rotating prices
Krobus can also become your housemate if you remain unmarried, giving him a room in your farmhouse and daily gifting interactions.
Pro Tip: The moment you unlock the Sewers, buy the Stardrop from Krobus immediately. It permanently expands your energy bar, which improves every single day of farming, mining, and fishing for the rest of your playthrough.
Skull Key 80 Donations
The Skull Key unlocks the Skull Cavern in Calico Desert, the primary source of Iridium Ore in the game. Without Iridium, you cannot craft Iridium Sprinklers, upgrade your tools to Iridium level, or access several key late-game crafting recipes.
Every serious farm eventually depends on Skull Cavern. Reaching 80 Museum donations as early as possible opens this critical resource window at the right time in your progression arc.
Stardrop 95 Donations (Full Completion)
Donating all 95 unique items earns you a Stardrop — one of the rarest items in the game. Each Stardrop you collect permanently increases your maximum energy. The Museum Stardrop is one of eight available in the entire game, and collecting all eight is required for Perfection.
All 42 Artifacts: Where to Find Every One
Artifacts are harder to collect than minerals because they depend on specific locations, luck, and sometimes rare enemy drops. Knowing exactly where to look cuts your completion time significantly.
How Artifacts Are Found
Six main sources:
- Artifact Spots.Patches of ground showing three wriggling worms. Use your Hoe to dig them up. These are the primary sources for most artifacts and appear across every outdoor map.
- Fishing Treasure Chests. appear during fishing when the treasure chest icon slides across the minigame bar
- Monster Drops: Specific enemies drop specific artifacts. Check each monster’s known drop table when hunting for a particular item.
- Geodes and Artifact Troves. Omni Geodes and Artifact Troves (purchased from the Desert Trader) yield various artifacts
- Bone Nodes.Found inside Skull Cavern. Breaking them drops bone and fossil artifacts.
- Mine Dirt Patches.How dirt patches on Mine floors for occasional artifact finds
Artifact Spots by Location
Different outdoor areas produce different artifacts. Targeting the right area for what you need saves enormous time:
| Location | Key Artifacts Found |
| Pelican Town / Farm | Arrowhead, Prehistoric Handaxe |
| Cindersap Forest | Scapula, Ancient Seed, Chicken Statue |
| Mountain / Mines Entrance | Prehistoric Skull, Dinosaur Egg, Amphibian Fossil |
| The Mines (deep floors) | Dwarf Scrolls I-IV, Dwarf Gadget |
| Calico Desert | Golden Mask, Golden Relic, Elvish Jewelry |
| Skull Cavern | Prehistoric Rib, Ancient Drum |
| Ginger Island | Bone Flute, Mummified Bat, Mummified Frog |
Hardest Artifacts to Find
These specific artifacts give players the most trouble and deserve extra attention:
Prehistoric Bone Pieces (Skull, Scapula, Prehistoric Rib). These appear mainly in the mountain-area artifact spots near the Mines entrance. Dig every worm tile in that zone consistently throughout all four seasons.
Dinosaur Egg: One of the most famous rare artifacts. Best obtained as a rare drop from Pepper Rex enemies deep in Skull Cavern. Also found occasionally in Mountain Artifact Spots and fishing treasure chests.
Dwarf Gadget Found in Magma Geodes or dropped by Duggies in the lower Mine floors. Stock up on Magma Geodes during deep mining runs.
Ancient Seed Drops from bug-type enemies, fishing treasure chests, Artifact Troves, and Cindersap Forest and Mountain Artifact Spots. One of the more reliably findable rare artifacts despite its reputation.
Pro Tip: Artifact Spots spawn far more frequently during Winter than any other season. Dedicate your Winter months specifically to aggressive artifact hunting across all outdoor maps. Carry your Hoe every single day without exception.
All 53 Minerals: How to Collect Them Fast
Minerals flow more naturally than artifacts because regular mining generates geodes automatically. The key is knowing which geode type to crack for which minerals.
The four geode types:
| Geode | Best Minerals Inside |
| Regular Geode | Calcite, Limestone, Marble, Granite, Basalt, Mudstone |
| Frozen Geode | Aquamarine, Frozen Tear, Ghost Crystal, Kyanite, Lunarite |
| Magma Geode | Fire Quartz, Obsidian, Ruby, Baryte, Neptunite |
| Omni Geode | Random minerals from all categories |
Clint cracks geodes for 25 gold each at his Blacksmith shop. After reaching 20 Museum donations, you unlock the Geode Crusher recipe — letting you crack geodes on your farm using Coal and saving daily travel time.
Additional mineral sources:
- Monster kills throughout the Mines (floor-specific drops)
- Copper Panning in rivers on days when golden shimmer spots appear
- Artifact Troves purchased from the Desert Trader using Omni Geodes
- Fishing treasure chests (seasonal and location-specific minerals)
- Skull Cavern floors (high-tier minerals including Iridium and Fire Quartz)
Pro Tip: Instead of cracking all your Omni Geodes at Clint’s, save large batches and trade them with the Desert Trader for Artifact Troves. These have a significantly higher probability of yielding rare minerals that would otherwise take weeks of random geode cracking to find.
Items You Should NOT Donate Right Away
Most items should go directly to Gunther the first time you find them. But a handful have secondary uses that matter more than the donation reward.
Ancient Seed: Donate your very first one to unlock the Ancient Seed crafting recipe and receive a free plantable pack. After that, run all future Ancient Seeds through a Seed Maker instead of donating them. Ancient Fruit Wine is one of the most profitable items in the entire game, and every additional plant compounds your income.
Prismatic Shard: You can donate it, and Gunther will accept it. However, most experienced players recommend using your first Prismatic Shard to obtain the Galaxy Sword from the three pillars in Calico Desert before donating. The Galaxy Sword is the best weapon available before late-game alternatives and dramatically improves Skull Cavern performance.
Dinosaur Egg Incubate your first Dinosaur Egg in a Coop Incubator before donating. A pet Dinosaur produces Dinosaur Mayonnaise, which sells for 800 gold per jar. Unlock the passive income first, then donate a second egg if you find one.
High-Value Gems Ruby, Aquamarine, Amethyst, and Emerald are loved gifts for several villagers. Donate your first copy of each for the collection, but hold duplicates for friendship building before selling.
Expert Tips to Complete the Museum Faster
These strategies move the needle more than anything else when trying to speed up completion.
Check the TV Fortune Teller every morning. Your daily luck stat is a hidden number that directly affects artifact spot yields, fishing treasure chest frequency, and geode quality. On Very Happy or Happy luck days, prioritize all Museum-related activities, digging, mining, and fishing for chests. Save farm work for low-luck days.
Stack luck with food buffs
- Lucky Lunch gives +3 Luck
- Pumpkin Soup gives +2 Luck
These stack with your natural daily luck and produce noticeable differences in rare item drop rates during artifact hunting sessions.
Use the Treasure Hunter Fishing Bobber. This bobber increases the treasure chest appearance rate during fishing. Any time fishing is part of your artifact strategy, equip this bobber. Combine it with maximum Fishing skill for the best results.
Upgrade your Hoe before Winter artifact hunts. A Gold or Iridium Hoe covers multiple tiles per swing. During winter, artifact hunting is your most productive season for Artifact Spots. An upgraded Hoe lets you cover significantly more ground per energy bar.
Always carry the Copper Pan. River panning on days when golden shimmering spots appear occasionally, yields rare minerals that would otherwise require significant mining time to obtain. Keep the Copper Pan in your inventory as a passive collection habit.
Trade Omni Geodes to the Desert Trader for Artifact Troves. Artifact Troves consistently outperform regular Omni Geode cracking for rare minerals. Save your Omni Geodes in batches specifically for this trade rather than cracking them all at Clint’s.
Equip the Burglar’s Ring for monster drop artifacts. The Burglar’s Ring doubles the drop rate from every monster you defeat. When grinding for specific monster-drop artifacts like Dwarf Scrolls or the Dwarf Gadget, this ring cuts your time investment nearly in half.
Common Museum Mistakes and How to Fix Them
Accidentally selling artifacts. This is the single most common and painful mistake. Artifacts look like random inventory clutter and are easy to sell during daily cleanup. Before selling any unfamiliar item, open your Collections tab and verify it is already listed as donated. If it is not there, do not sell it.
Ignoring the Museum until late game, players who delay Museum donations until Year 2 or 3 miss the Rusty Key and Skull Key during the exact window when they would benefit most. Both unlocks are mid-game essentials. Treat Museum donations as part of your daily routine from Spring Year 1.
Cracking all geodes immediately. Cracking geodes the moment you return from mining feels productive, but it removes your flexibility. Save Omni Geodes specifically for Desert Trader Artifact Trove exchanges in the late game, where they deliver far better returns for collection completion.
Filling the six unreachable center display spaces. The six center-table spaces in the Museum cannot be examined once items are placed on them. Filling them with important artifacts means losing the ability to read their descriptions. Leave those six spaces empty or fill them with common duplicates.
Donating gems needed for gifting. Donating your only copy of a loved gift gem immediately removes your ability to use it for relationship building. Always donate the first copy, but keep one in storage for gift-giving until your friendship goals with relevant villagers are satisfied.
Frequently Asked Questions
How many items can you donate to the Stardew Valley Museum? There are 95 unique items available for donation — 42 artifacts and 53 minerals. The Museum has 102 display spaces, giving you 7 extra slots for decoration and layout flexibility.
What is the most important Museum reward in Stardew Valley? The Rusty Key at 60 donations is the single most impactful reward. It unlocks the Sewers, where you can buy a Stardrop from Krobus that permanently increases your maximum energy bar.
Do Lost Books count toward Museum completion? No. Lost Books are automatically added to the Library section when found, but do not count toward the 95-item Museum collection or the A Complete Collection achievement.
Can you rearrange the Museum display after donating? Yes. Interact with the small ledger on the left side of Gunther’s desk at any time to enter rearrange mode and move items to any available display space.
Do duplicate donations earn rewards? No. Gunther only recognizes and rewards unique donations. Duplicate items earn nothing and do not advance your milestone count.
What is the fastest way to find the last few missing artifacts? Focus on the winter months when Artifact Spots spawn most frequently. Use high-luck days, eat Lucky Lunch for a +3 Luck boost, and trade Omni Geodes with the Desert Trader for Artifact Troves. Use the Treasure Hunter bobber for fishing-based artifact hunts.
Is completing the Stardew Valley Museum required for Perfection? Yes. Museum completion — donating all 95 unique items — is one of the tracked requirements for reaching Perfection on the Perfection Tracker in Qi’s Walnut Room on Ginger Island.
What happens when you complete the full Museum collection? Gunther rewards you with a Stardrop, you earn the A Complete Collection achievement, and the Museum contribution is marked complete on your Perfection Tracker.
Final Thoughts
The Stardew Valley Museum rewards players who engage with it early and consistently. The seed rewards in the first 25 donations fund your early crops. The Geode Crusher at 20 donations removes daily Blacksmith trips. The Rusty Key and Skull Key at 60 and 80 donations open the two most important mid-game areas in the entire valley. The Stardrop at full completion makes every future day of farming more productive.
Start donating from Day 1 of Spring Year 1. Dig every Artifact Spot you pass. Crack your geodes regularly. Check your Collections tab every week and hunt specifically for what you are missing. The 95-item collection is a long game, but every single donation makes your farm stronger.